
Showing posts with label red velvet cake. Show all posts
Showing posts with label red velvet cake. Show all posts
Wednesday, February 14, 2018
Wednesday, November 20, 2013
Mini Red Velvet Bundt Cakes
I can't believe I haven't used my mini bundt pans from last Christmas until today. I finally put them to use for a quick birthday treat for two of the husband's coworkers. I always thought that bundt cakes had to be dense; however, I used my go to red velvet recipe and it not only held up well but it came out of the pan perfectly. Can't wait for another excuse to use my mini bundt pans.


Wednesday, August 14, 2013
Red Velvet Cupcakes (Cake4Kids.org)

I signed up for another Cake4Kids.org request this past week. This time I baked 4 dozen red velvet cupcakes with cream cheese frosting for one of the agencies. This cupcake combination has been done many times on this blog as seen here and here and even as a comparison here. I wanted to bring them to light again as I realized how forgiving my go to recipe is. I made these cupcakes with the milk and vinegar shortcut for buttermilk and I think that explained why there wasn't any differences when I forgot the extra tsp of vinegar at the end. I also used all purpose flour instead of cake flour and they still came out fluffy.
Wednesday, December 5, 2012
Holiday Baking Ideas
As I spend the next few weeks trying to narrow down what sweets I would be baking for everyone around here, here is a list of a few favorites from the archives. (I am shocked that there isn't a post with holiday cookies! I will definitely need to change that this year.)


Tuesday, February 7, 2012
Valentine's Day Recipes
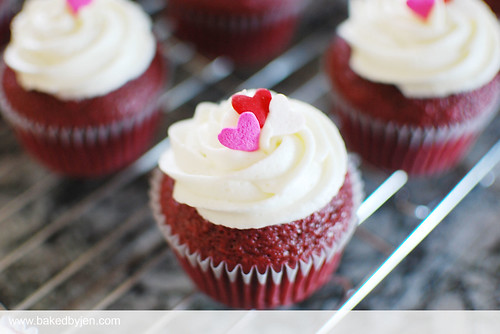
With Valentine's Day around the corner, I thought I'd compile a list of my go to Valentine's Day treats for inspiration to share whether it's with coworkers, friends, family, significant others.


Friday, December 30, 2011
Most Visited Posts of 2011
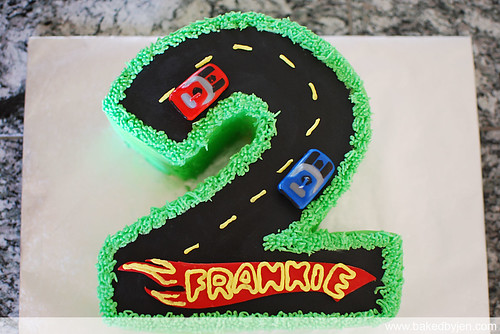
Here are the most visited posts of 2011 on BakedByJen.com!




Desserts for Work: Salted Caramel Brownies and Mini Strawberry Swirl Cheesecakes


A Giant Cupcake Cake
Thank you for following along with me as I documented my past year in the kitchen. It amazes me looking back and seeing how much I have accomplished because of the encouragement of friends and family; motivating me to create something that would blow them away.
My personal favorites of this past year was the Nikon cake for my cousin Dennis, the topper cake for a backyard wedding, and the winter wonderland cake for Cake4Kids.
Here's to an even sweeter New Year!
Thursday, February 24, 2011
Nikon D5000 Cake
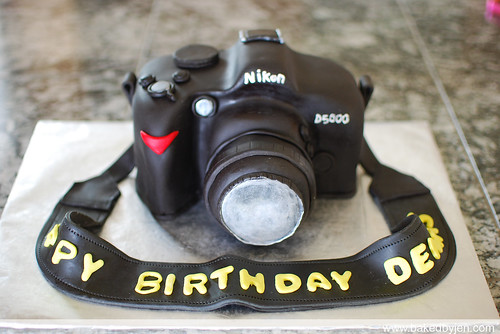
It has been a little over a year since I made what I thought at the time was my first "show stopping" cake per my sister's request. The cake requests are definitely getting more creative and complex. However, I can't complain as I am definitely learning a lot along the way.
My cousin, a photography hobbyist, celebrated his birthday last week and as a gift to him, I made him a cake replica of his camera per his request. Having a lot of images to go by helps a lot. After looking at several images of the camera online, I realized it was similar to my own Nikon D60. So, I actually used that as a model and then piped on his camera model at the end.

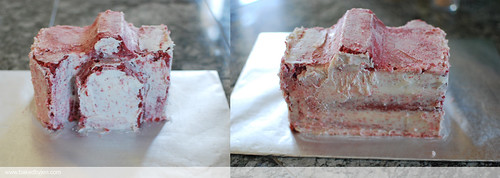
This was my first time carving without a template; so scary! I started with a 2 layer 8-inch square red velvet cake with vanilla buttercream frosting which I cut in half and then proceeded to carve. After sending a quick picture of it to my boyfriend, he commented that it was too small. So, I added another layer to the top and to the side. I also changed the jutting top piece into a trapezoid from a square the second time around.
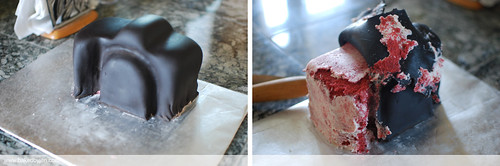
I used store bought fondant to cover the cake and it was a nightmare to work with that day. I couldn't get it as pliable as I wanted/needed and my first attempt ended with way too wrinkles. So, I ripped it all off and started over. That resulted in losing all my sharp edges but nothing cake spackle couldn't fix.
I realize I don't take any pictures of the lens in the making! It was made of store bought rice krispies treats I smashed together and covered in two layers of fondant to avoid the lumps and bumps. Pearl luster dust mixed with vodka gave the perfect illusion of a glare for the lens.
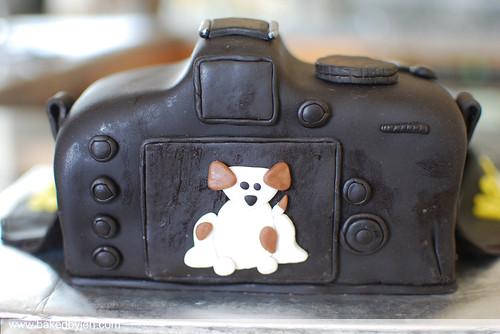
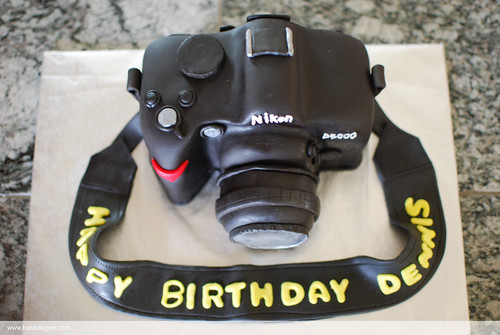
My two personal favorite details on the cake was sneaking my dog Patches onto the back screen and the personalized camera strap. I love the trim I was able to put onto the strap with my Wilton cutter/embosser wheel. I learned that I need to work on my piping skills; it took me five attempts to just pipe the words Nikon and D5000 onto the cake correctly!
Sunday, January 23, 2011
Red Velvet Cupcakes Comparison
With Valentine's day around the corner, I noticed a lot of red velvet cupcakes posts popping up around the blogosphere lately. I have a pretty good go to red velvet cake recipe; however, I noticed a lot of people were praising Cakeman Raven's recipe. Because I had a tub of cream cheese frosting begging to be used soon, I decided to do a quick comparison.
The two recipes are nearly identical except for the use of cake flour vs all purpose flour, oil vs butter, and teaspoon vs tablespoon for cocoa powder. I did a smashup of the two recipes and came up with the following to compare BUTTER vs OIL.
Red Velvet Cupcakes
A Baked By Jen Original
Makes about 24 cupcakes
3 cups cake flour
2 tbsp cocoa powder
1 tsp salt
1 tsp baking soda
1 cup butter or vegetable oil
1 1/2 cups sugar
2 eggs
1/2 teaspoon red gel-paste food color
1 cup buttermilk
1 tsp vanilla extract
1 tsp vinegar
Preheat oven to 350. Line 2 muffin baking pans with 12 standard size baking cups.
Sift dry ingredients together and set aside.
Place butter/oil and sugar in bowl of electric mixer and beat at medium-speed until light and fluffy, about 5 minutes. Beat in eggs, one at a time. Dissolve the gel paste into the vanilla. With the mixer on low, add mixture. Add vinegar.
Add flour mixture alternately with buttermilk in two batches. Scrape bowl and mix just long enough to combine.
Pour batter into prepared pans and bake for 16-18 minutes or until toothpick inserted into the center of cupcake comes out with a few crumbs clinging to the toothpick. Cool in pans for 10 minutes and then place on cooling rack to cool to room temperature.
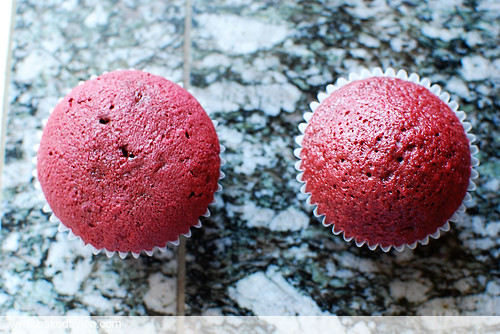
butter vs oil - top view
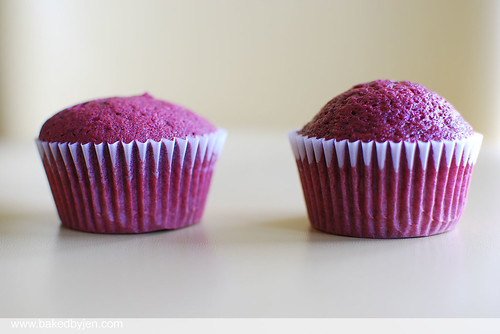
butter vs oil - side view
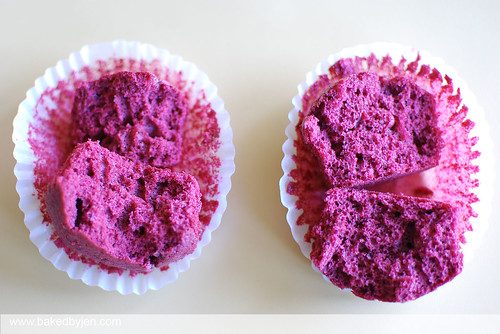
butter vs oil - inside view
The batch made with oil looked a lot better, a nice dome and even appeared to look more moist with the shiny top. However, in my opinion, the batch made with butter was much more superior in taste. Also, the cake was fluffier, more tender with a tighter crumb.

Photo Credit: Dennis Ha Photography
(Disclaimer: Patches didn't actually eat the cupcake.)
(Disclaimer: Patches didn't actually eat the cupcake.)
Thursday, December 9, 2010
Holiday Baking Repertoire
I am so ashamed. For someone who loves to bake, you'd think I would have accumulate quite a list of go to sweets for the holidays. I definitely need to step it up this season. Stay tuned for some great new ideas. In the meantime, here's a flashback of some oldies but goodies.

This red velvet cheesecake cake won me first place at a company holiday bake off. What's not to love about it; it's two layers of red velvet cake "filled" with an entire original NY cheesecake and then frosted in vanilla bean cream cheese frosting.

These are definitely the best brownies I ever made. For the holidays, I like to mix Andes baking chips into the batter or pour half the brownie batter into the pan, lay a handful of York peppermint patties down, and then pour in the remaining batter.

Pecan pie bars were just added last year to my repertoire. They were quite the crowd pleaser at my family Christmas party as well as the Cake4Kids table at the SCS Annual Auction last week.

I've made these red velvet cupcakes with vanilla bean cream cheese frosting for many different holiday parties over the past few years. I've alternated between a few different recipes but my favorite one to date is this one.

This red velvet cheesecake cake won me first place at a company holiday bake off. What's not to love about it; it's two layers of red velvet cake "filled" with an entire original NY cheesecake and then frosted in vanilla bean cream cheese frosting.


Pecan pie bars were just added last year to my repertoire. They were quite the crowd pleaser at my family Christmas party as well as the Cake4Kids table at the SCS Annual Auction last week.

Friday, October 15, 2010
Di Bay's Birthday Cake
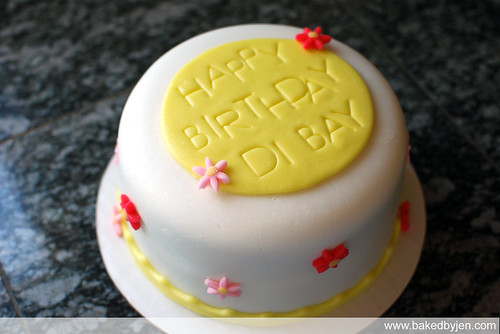
I was glad to have had extra red velvet cakes and vanilla buttercream frosting in my freezer when my Mom told me it was my aunt's birthday. Not ready to tackle anything out of the ordinary yet (as I was still recovering from last week), I quickly threw this one together with clean and simple marshmallow fondant decorations.
Sunday, October 3, 2010
Optimus Prime Cake
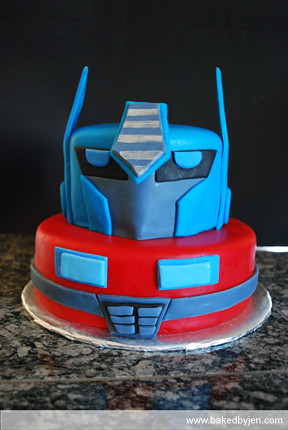
I knew I wanted to make this cake for my brother for his birthday for several months now! At first, I thought I might have been too ambitious but it wasn't as difficult as I imagined. I should've made the bottom tier 3 layers and I should've allowed the antennas to dry a few days earlier but all in all, I'm quite happy with the results.
The cake was made of 2 8-inch lemon cakes with raspberry buttercream frosting and 2 6-inch red velvet cakes with cheesecake mousse filling and vanilla buttercream frosting. I used a mix of Duff brand buttercream fondant and homemade marshmallow fondant to cover and detail the cakes. Adding tylose powder to the store bought fondant did not speed up the drying process. It did work wonders on the homemade fondant though.
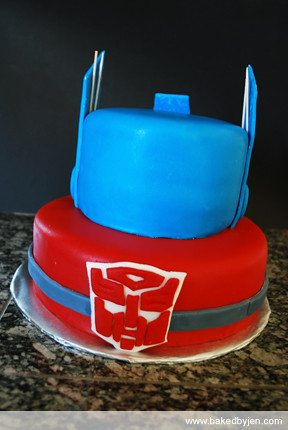
The toothpicks actually kept the antennas from bending over and by the evening, they were finally dry enough to stand up on their own. Tylo glue was my best friend. It held up the pieces through the entire 45 mins drive without a hitch.
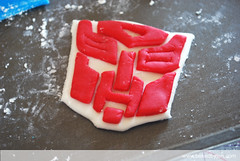
I couldn't make this cake without incorporating the autobot logo somewhere, so I attached it to the back. I used the good ole pumpkin carving technique to get an exact replica of the image.
Saturday, April 3, 2010
Red Velvet Cupcakes with Vanilla Bean Cream Cheese Frosting Revisted
A friend, who always sees and hears about my baking but has yet to try any, was in town. So, I decided to make him some cupcakes for once. Any opportunity to bake is a good opportunity. He likes cream cheese frosting so I decided with the classic duo of red velvet cupcakes and vanilla bean cream cheese frosting (adapted from BHG New Cook Book). Found a new recipe for my red velvet cupcakes (from Cake Central) as I wasn't 100% satisfied with the recipe I was already using. I thought these came out a bit dry but they were exactly what I imagined a good red velvet cupcake to taste like!
Saturday, December 12, 2009
Award Winning Red Velvet Cheesecake Cake

Step 1. Bake an 8-inch Original New York Cheesecake (from Junior's Cheesecake Cookbook)

Step 2. Bake two 8-inch Red Velvet Cakes

Step 3. Make the Vanilla Bean Cream Cheese Frosting

Step 4. Assemble the layers
Step 5. Frost the cake
Subscribe to:
Posts (Atom)
