Friday, October 29, 2010

Halloween Sugar Cookies


I couldn't possibly let Halloween pass on by without baking something for the occasion.  So, I gave another try at decorating sugar cookies.  I think this time around I got a better handle on working with sugar cookie dough and royal icing.

What I found very helpful was rolling out the dough in between two parchment papers to desire thickness and placing it on a cookie sheet and placing it into the fridge to chill.  This speed up the process and made the dough very manageable.  HOWEVER!  I did make one mistake which was rolling the dough out too thin.  The icing to cookie ratio was quite overwhelming even for a "sugar" cookie.

Have a fun and safe weekend!

Sugar Cookies
slightly adapted from Cake Central
Makes about 2-3 dozen cookies


1 cup unsalted butter
1 cup white sugar

1 egg
1/2 tsp vanilla extract
1/2 tsp almond extract

3 cups all purpose flour
1-1/2 tsp baking powder
1/2 tsp salt

Cream butter and sugar until light and fluffy.

Add egg and extracts.  Mix well.

Shift dry ingredients in a medium bowl and add a little at a time into the butter mixture.

Mix until flour is completely incorporated and dough comes together.

Roll out dough in between two parchment papers.  Place dough and parchment paper on a cookie sheet and place in fridge to chill.  Continue until all of the dough has been used up.  First batch should be chilled and ready to cut into desired shapes.

Bake at 350F for 8-10 minutes.

Reroll leftover dough and repeat the process.


Royal Icing
slightly adapted from Wilton
Makes about 3 cups of icing

2 tablespoons of meringue powder
4 cups of confectioners' sugar
6 tablespoons of warm water
1/4 tsp of almond extract

Beat all ingredients until icing form peaks (7-10 minutes at low speed with heavy duty mixer or 10-12 minutes with hand held mixer at high speed).

For stiffer icing, use 1 tablespoon less water.

For flooding, add 1 tsp of water at a time until proper consistency is reached.

Monday, October 25, 2010

Pumpkin Whoopie Pies with Cream Cheese Frosting


My nephew was over at my place on Saturday and I used his request to bake something together to finally tackle the infamous whoopie pies.  I've been bookmarking so many whoopie pie recipes that I knew I needed to just own the book, Whoopie Pies.  Was so excited when my brother's girlfriend gave me a copy as a thank you gift for a cake I made.

First recipe out of the book and it was a hit.  I don't know why I waited this long to make my first whoopie pie.  Expect to see a lot more soon!

Thursday, October 21, 2010

Mini Glazed Donut Muffins


I should be playing with my dog; she looks sad laying there on her bed but I had try just one more donut recipe today.  These mini donut muffins are a lot closer in taste to the store bought cake donuts I'm trying to replicate.  Because a cinnamon/sugar mixture wouldn't cut it, they were double dipped in a powdered sugar glaze.


Mini Glazed Donut Muffins
slightly adapted from My Baking Addiction
Makes about 24 mini muffins


2 tablespoons unsalted butter
2 tablespoons vegetable oil
1/4 cup granulated sugar
2 tablespoons + 1-1/2 teaspoons brown sugar
1 large egg
3/4 teaspoon baking powder
1/8 teaspoon baking soda
1/2 to 3/4 teaspoon ground nutmeg, to taste (I used 1/2 teaspoon)
1/3 teaspoon salt
1/2 teaspoon vanilla extract
1-1/3 cups all purpose flour
1/2 cup milk


For the Glaze:
4 tablespoons melted butter
1-1/3 cups powdered sugar
1 teaspoon vanilla extract
1-2 tablespoons hot water


Preheat the oven to 425°F. Lightly grease mini muffin trays. Or line with mini paper muffin cups, and grease the cups with non-stick vegetable oil spray; this will ensure that they peel off the muffins nicely.

In a medium-sized mixing bowl, cream together the butter, vegetable oil, and sugars till smooth.


Add the egg, beating to combine.


Stir in the baking powder, baking soda, nutmeg, cinnamon, salt, and vanilla.


Stir the flour into the butter mixture alternately with the milk, beginning and ending with the flour and making sure everything is thoroughly combined.


Spoon about 1 tablespoon of the batter into the prepared trays.


Bake the muffins for 8 to 10 minutes, or until they’re a pale golden brown and a cake tester inserted into the middle of one of the center muffins comes out clean.


In a medium bowl, prepare the glaze by mixing together the melted butter, confectioners’ sugar, vanilla and water. Whisk until smooth.


When muffins have cooled slightly, dip the muffin crown into the glaze and allow the glaze to harden. Repeat, if desired.  (I recommend repeating.)

Serve warm or cool on a rack and wrap airtight. Muffins will keep at room temperature for about a day.

Oven Baked Apple Donuts


My mom dropped off some apples the other day and the first thing I thought of was what can I bake with them.  I wasn't sure I had enough apples for an apple pie so I settled for the next best thing; the oven baked apple donuts I saw awhile ago.  I've been hoarding quite a few donut recipes since my last attempt at them.  These aren't quite the cake donuts which I'm in love with but they are pretty good in their own kind of way.


Oven Baked Apple Donuts
slightly adapted from Chocolate Shavings
Makes about 24 mini donuts


1/4 cup of lightly packed brown sugar
1/4 cup of granulated sugar
1-1/2 cups of all-purpose flour
1-3/4 tsp baking powder
1/2 tsp salt
1/2 tsp nutmeg
1/3 cup of cold butter, cut into small pieces
1 egg
1/4 cup of milk

1-1/2 cups of bite size chunks of apple, peeled and cored

For the Coating:
1/4 cup of butter, melted
1/3 cup of granulated sugar
1 tsp cinnamon powder

Preheat your oven to 350F.  Grease mini muffin pans.  Set aside.


Whisk the sugars, flour, baking powder, salt, and nutmeg in a bowl.  Add the cold chopped butter. Using a pastry cutter, work the butter into the flour mixture until it resembles coarse crumbs.

In a separate bowl, beat the egg. Mix in the milk and fold in the chopped apples. Add the egg mixture to the flour mixture. Stir until incorporated, using a spatula or spoon, making sure not to overmix. Place a tablespoon of batter into each mold of a greased mini muffin pan.

Bake for 15-18 minutes or until the donuts are just golden. Remove from the oven, unmold and lightly brush each donut with the melted butter. Dunk in a bowl with the sugar and cinnamon mixed in. Shake off excess sugar and serve immediately.

Saturday, October 16, 2010

Mochi Ice Cream


My mom has been raving about the green tea mochi ice cream she recently discovered at Japanese restaurants.  So, of course, I volunteer to make her some.


Making the green tea ice cream was easy as I used the recipe from The Perfect Scoop.  I thought it was a bit sweeter than what I'm used to though.  To make things easier, I froze the ice cream in a mini muffin tray.


The green tea mochi recipe was adapted from All Recipes.  Instead of mixing the flour with water, I used green tea!  This stuff was so sticky.  Me being me wanted everything to be uniform.  I started out rolling the mochi and using my circle cutters to make circles to wrap the ice cream.  Then, I realized that I was tinkering way too much with the mochi that it would just ooze out ice cream at random thin spots.  So then, I decided to cut out blobs of the mochi and hand stretch it out.  You have to work fast!  Towards the end when the ice cream discs were melting, I had a lot of trouble sealing it.

All in all, it tasted great, just like the ones in the restaurants but I told my mom I'm going to leave this one to the experts.

Friday, October 15, 2010

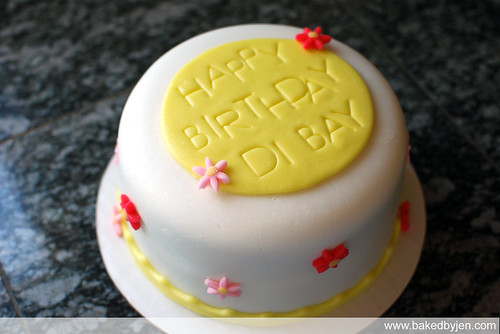
Di Bay's Birthday Cake

di bay's birthday cake


I was glad to have had extra red velvet cakes and vanilla buttercream frosting in my freezer when my Mom told me it was my aunt's birthday.   Not ready to tackle anything out of the ordinary yet (as I was still recovering from last week), I quickly threw this one together with clean and simple marshmallow fondant decorations.

Thursday, October 14, 2010

Chocolate Chip Cookie Dough Brownies


In honor of National Dessert Day, I wanted to bake something but I couldn't decide between cookies or brownies.  And then, I remembered reading somewhere that there are these hybrid chocolate chip cookie dough brownies that exist.

I doubled the Hershey's Best Brownies recipe and halved the Nestle Toll House Chocolate Chip Cookies recipe.  Out of habit, I used a 8x8 pan for the brownies.  It wasn't until I had to drop the spoonfuls of cookie dough on to the brownie batter that I realized this pan was too small.  So, I just ended up spreading all of the cookie dough across the top.  It took twice as long to bake but it was sooo worth it.

Monday, October 11, 2010

First Birthday Cakes

I don't know what I was thinking. The last time I agreed to making two cakes in one weekend, I told myself to never do that again. I guess I thought I could really do it this time with very minimum stress, hah!!!


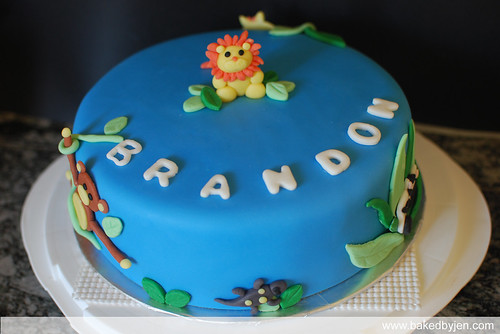
jungle theme birthday cake


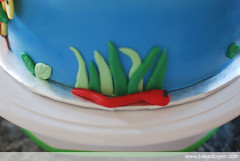
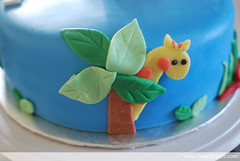
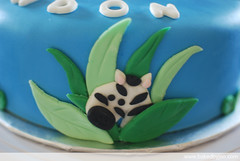
The jungle theme birthday cake actually didn't give me too many problems. It was a chocolate cake with oreo mousse filling and chocolate buttercream frosting covered and decorated with marshmallow fondant.  All the fondant animals were secured to the cake with tylo glue.  I loved how it turned out!


fondant monkey fondant lizard

fondant lion fondant snake

fondant giraffe fondant zebra


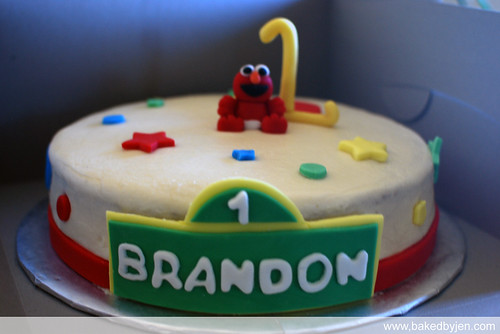
As for the Baby Elmo theme birthday cake, it almost broke me.  I didn't even want to take a picture of it but in the end I did a quick snap of it in the box right before delivery; hence the bad quality picture.  I went with my go to carrot cake and cream cheese frosting.  The plan was to wait for the cream cheese frosting to crust in order to use the Viva towel method and skip the fondant covering.  I'm one of those that don't fridge fondant cakes and believe anything dairy should be refrigerated.  However, I couldn't get the cake layers on the top tier to stop sliding; so, I just skipped putting it on the cake and focused on the bottom tier.  And then, the carrot cake was so moist and all these crumbs were getting pulled off and stuck in the frosting.  I did do a crumb coat but I was slowly entering the wee hours of morning (and losing my sanity) and probably didn't give it enough time to crust.  I slapped everything on and crossed my fingers that it would stay put.  The only thing I liked about the cake was the baby elmo, the number one, and the sesame street sign made of gumpaste which I made days in advance!


baby elmo theme first birthday cake

Sunday, October 3, 2010

Optimus Prime Cake

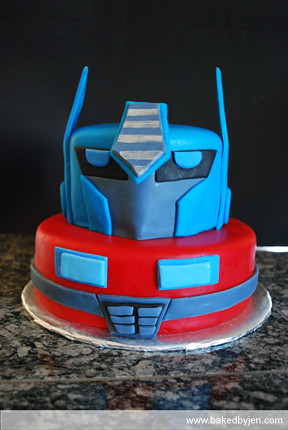
optimus prime - front

I knew I wanted to make this cake for my brother for his birthday for several months now! At first, I thought I might have been too ambitious but it wasn't as difficult as I imagined. I should've made the bottom tier 3 layers and I should've allowed the antennas to dry a few days earlier but all in all, I'm quite happy with the results.

The cake was made of 2 8-inch lemon cakes with raspberry buttercream frosting and 2 6-inch red velvet cakes with cheesecake mousse filling and vanilla buttercream frosting.  I used a mix of Duff brand buttercream fondant and homemade marshmallow fondant to cover and detail the cakes.  Adding tylose powder to the store bought fondant did not speed up the drying process.  It did work wonders on the homemade fondant though.

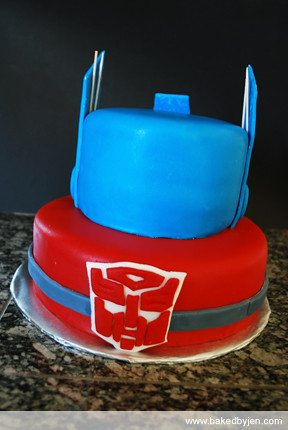
optimus prime - back

The toothpicks actually kept the antennas from bending over and by the evening, they were finally dry enough to stand up on their own. Tylo glue was my best friend.  It held up the pieces through the entire 45 mins drive without a hitch.

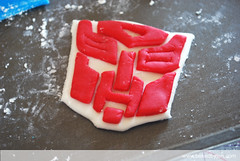
I couldn't make this cake without incorporating the autobot logo somewhere, so I attached it to the back.  I used the good ole pumpkin carving technique to get an exact replica of the image.

autobot logo
Related Posts with Thumbnails