Pages

Friday, December 30, 2011

Most Visited Posts of 2011

Here are the most visited posts of 2011 on BakedByJen.com!

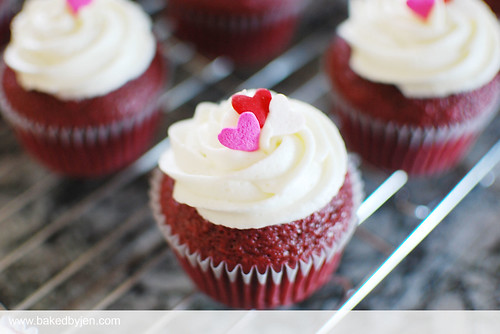
red velvet cupcakes

Desserts for Work: Salted Caramel Brownies and Mini Strawberry Swirl Cheesecakes

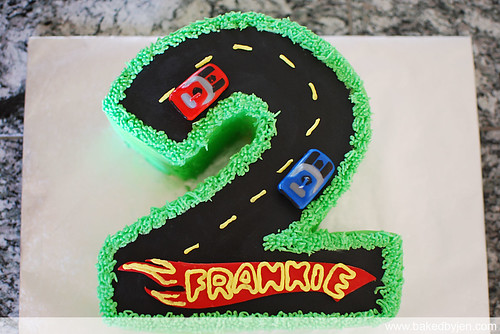
race car track cake

A Giant Cupcake Cake 

Thank you for following along with me as I documented my past year in the kitchen.   It amazes me looking back and seeing how much I have accomplished because of the encouragement of friends and family; motivating me to create something that would blow them away.

My personal favorites of this past year was the Nikon cake for my cousin Dennis, the topper cake for a backyard wedding, and the winter wonderland cake for Cake4Kids.

Here's to an even sweeter New Year!

Monday, December 26, 2011

Cheesecake Brownies

Dense and rich cheesecake brownies from Baking Illustrated.

Happy Holidays!

Sunday, December 18, 2011

Cookies for Charity (Cake4Kids.org)


My sister and I baked an assortment of dessert bites for Cake4Kids as part of their commitment to providing over 1000 dessert and appetizer bites at the Sunnyvale Community Services Annual Auction.  Together, we made pecan tassies, peppermint brownies, and pumpkin snickerdoodles.

Finally got to making the pumpkin snickerdoodles which I had bookmarked for my fall repertoire.  The pecan tassies were an ode to the pecan pie bars I made last year for this same event.  As for the brownies, I figured you can't go wrong with a chocolate and peppermint combo.

Pumpkin Snickerdoodles
adapted from Annie's Eats
Makes about 3-4 dozen cookies

For the cookies:
3¾ cups all-purpose flour
1½ tsp. baking powder
½ tsp. salt
½ tsp. ground cinnamon
¼ tsp. ground nutmeg
1 cup (2 sticks) unsalted butter, at room temperature
1 cup granulated sugar
½ cup light brown sugar
¾ cup pumpkin puree
1 large egg
2 tsp. vanilla extract

For the coating:
½ cup granulated sugar
1 tsp. ground cinnamon
½ tsp. ground ginger
Dash of allspice

Directions:
In a medium bowl, combine the flour, baking powder, salt, cinnamon, and nutmeg.  Whisk to blend and set aside.

In the bowl of an electric mixer, beat together the butter and sugars on medium-high speed until light and fluffy, 2-3 minutes.  Blend in the pumpkin puree.  Beat in the egg and vanilla until incorporated.  With the mixer on low speed add in the dry ingredients and mix just until incorporated.  Cover and chill the dough for at least 1 hour.

Preheat the oven to 350˚ F.  Line baking sheets with silicone baking mats or parchment paper.

Combine the sugar and spices for the coating in a bowl and mix to blend.

Scoop the dough (about 2½ tablespoons) and roll into a ball.  Coat the dough ball in the sugar-spice mixture and place on the prepared baking sheet.  Repeat with the remaining dough to fill the sheets, spacing the dough balls 2-3 inches apart.  Dip the bottom of a flat, heavy-bottomed drinking glass in water, then in the sugar-spice mixture, and use the bottom to flatten the dough balls slightly.  Recoat the bottom of the glass in the sugar-spice mixture as needed.

Bake the cookies for 10-12 minutes, or until just set and baked through.  Let cool on the baking sheets about 5 minutes, then transfer to a wire rack to cool completely.

Store in an airtight container.
Friday, December 2, 2011

Chococat Cake

It's getting a lot harder for me to take pictures in natural light around this time of year!  My brother was taking this cake to work the next morning and I was only able to snap a few shots before bed.

This cake reminded me on how much I dislike using store bought fondant to cover an entire cake.  The last time I covered an entire cake in fondant, I ended up ripping a lot of the smooth edges off my cake and redoing it.  Fortunately, no edges were ripped off but the cold weather made it extremely difficult to knead the store bought fondant.

Cake was chocolate cake with strawberry frosting as requested by recipient.  I hope she enjoyed it!

Friday, November 18, 2011

Hello Kitty Cake - Full Body


Hello Kitty seems to be extremely popular amongst my friends.  I have made Hello Kitty cakes for several birthdays as well as a baby shower now.  This time around, the recipient requested a full body Hello Kitty.  This cake requires minimal fondant decorations; however, don't let that fool you.  It took me a bit of time trying to figure out how to exactly cut out the clothes to cover the fondant body in 2d fashion.  Also, I actually made the body and head separately and placed the two cakes together on the board at the end.  I don't know whether that was smarter or not but it worked out for me luckily.

I got to try out a new recipe combo on this cake as the birthday girl wanted mocha cake and buttercream frosting.  I used this tried and true recipe for cupcakes from Brown Eyed Baker which thankfully converted nicely to cake as well.

Wednesday, November 16, 2011

Blue Velvet Cake


Given I already done an iPad cake this year, I originally wasn't planning to blog about this cake (hence no pictures besides these ones which were off my friend's camera).   However, after sitting here eating a slice of leftover cake, I knew I had to share the recipe for this amazing blue velvet cake.  It is very similar to my version of the red velvet cake; it's very moist and dense.

I had a lot of bulge the last time I made the iPad cake, so this time, I spent extra time forcing/allowing the cake to settle.  After filling the cake, I took a sheet pan and placed it on top of the cake (protected with saran wrap).  I stood up on a chair and placed as much weight as I can on the cake.  In addition, I left a container of flour and sugar on top of the sheet pan for 30+ minutes while I cleaned up.  This allowed me to scrap off the bulge of frosting before proceeding.

Blue Velvet Cake
adapted from Food Network
Makes 1 8-inch round cake

Ingredients:
1 1/2 cups sugar
1/2 pound (2 sticks) butter, at room temperature
2 eggs
1 tablespoon cocoa powder
2 1/2 cups cake flour
1 teaspoon salt
1 cup buttermilk

1/2 tsp blue food gel paste (2 ounces liquid food coloring)
1 teaspoon vanilla extract
1/2 teaspoon baking soda
1 tablespoon vinegar


 Directions:
Preheat oven to 350 F degrees.  Line and spray 2 8in by 2in round circle pans with parchment paper and baking spray.


Sift together the cocoa powder, flour, and salt into a medium size bowl.  Set aside.


Dissolve the food gel paste into the vanilla extract in a small bowl.  Set aside.

In a mixing bowl, cream the sugar and butter, mix until light and fluffy. Add the eggs 1 at a time and mix well after each addition. Add the food gel paste/vanilla extract mixture; mix well.

Add flour mixture to the creamed mixture alternately with buttermilk.

In a small bowl, combine baking soda and vinegar and add to mixture; mix well.


Pour batter into pans. Bake for 25 minutes, or until a toothpick inserted into the center comes out clean. Remove from heat and cool completely before frosting.

Tuesday, November 8, 2011

Apple Pie Bars


Finally, I am back on track with baking Fall goodies to add to my repertoire.  I have yet to bake an apple pie from scratch but these apple pie bars are the perfect lead in.  These were quite labor intensive but so worth it.  (Note to self: Ask for an apple corer and a mandoline for Christmas!) The tart apple filling balanced perfectly with the sweet shortbread crust.  As for the crumb topping, I  could eat it by the spoonful.  When making the recipe, it seemed like a lot of crumb topping but trust me, you want every morsel packed on top.

Step 1 - Make the crust

Step 2 - Make the filling

Step 3 - Make the topping

Step 4 - Assemble and Bake


Apple Pie Bars
from My Baking Addiction
Makes 4 dozen bars

Ingredients:
For the Crust
3 sticks unsalted butter, softened
3/4 cup sugar
3 cups all-purpose flour
1/2 teaspoon kosher salt

For the Filling
6 tablespoons unsalted butter
1/2 cup light brown sugar
12 Granny Smith apples (about 6 pounds)—peeled, cored and thinly sliced
1 tablespoon cinnamon
1/4 teaspoon freshly grated nutmeg
1/2 cup water, if necessary

For the Topping
3 cups quick-cooking oats
2 cups all-purpose flour
1 1/2 cups light brown sugar
1 1/4 teaspoons cinnamon
1/2 teaspoon baking soda
1/2 teaspoon kosher salt
3 sticks (12 ounces) unsalted butter, cut into 1/2-inch cubes and chilled
3/4 cup chopped pecans

Directions:
Make the Crust
Preheat the oven to 375°. Line a 11-by-17-inch rimmed baking sheet with foil, allowing it to come up the edges.  Grease the foil lightly. In a standing mixer fitted with the paddle attachment, beat the butter with the sugar at medium speed until light and fluffy, about 2 minutes. At low speed, beat in the flour and salt until a soft dough forms.

Press the dough over the bottom of the prepared pan creating an even layer. Bake in the center of the oven for about 20 minutes, until the crust is golden and set. Let cool on a rack.

Make the Filling
In an extra large skillet, melt 6 tablespoons of the butter with 1/2 cup of the light brown sugar. Add the apples to the skillet and cook over high heat, stirring occasionally, until softened, about 10 minutes or longer.  Cook until the apples are caramelized and very tender and the liquid is evaporated.  Stir in the cinnamon and nutmeg.  Scrape up any bits stuck to the bottom of the skillet and if necessary, add up to 1/2 cup of water to prevent scorching. Let cool. (I did not need to add any water to my skillet.)

Make the Topping
In a large bowl, mix the oats with the flour, light brown sugar, cinnamon, baking soda and salt. Using a pastry blender or your fingers, cut the butter into the flour until the mixture resembles coarse meal. Stir in the pecans.

Assemble and Bake
Spread the apple filling over the crust. Scatter the crumbs on top, pressing them lightly into an even layer. Bake in the center of the oven for 45 minutes to 1 hour, until the topping is golden; rotate the pan halfway through baking. Let cool completely on a rack before cutting into bars.

Monday, October 31, 2011

Lemon Bars


When life hands you lemons, you make lemon bars.  Again, I am behind on adding to my Fall recipes but I had a bag of lemons in my fridge; so, I made lemon bars to bring them to my cousin's dinner party.  The recipe was from Baking Illustrated; no surprise.  My sister is usually the one that makes all the lemon bars in the house but now I definitely have a new recipe for her to try.  The crust and lemon curd were the perfect balance.  Perfect amount of tartness and sweetness.

Monday, October 3, 2011

Teenage Mutant Ninja Turtles Cake


This isn't the fall-esque baked goods I promised; however, it is my brother's birthday today.  As a child of the 80s, there was nothing more fitting than making him a TMNT cake.  Last year, I knew I wanted to make him the Optimus Prime cake but this year I had no idea how to improve upon that. My sister came up with this great idea, even sketching me the picture to follow.  I love that it is very different from the typical TNMT cake.  I am partial to believe she just wanted to make cute fondant animals again given she did an awesome job helping with my last cake.


For this cake, I dabbled with isomalt for the first time.  We used an empty paper towel roll wrapped in parchment paper.  Once the isomalt was ready to work with, we quickly wrapped it around the tube and cut out the paper tube once it set.  Then, we cracked it to have all the ooze spilling out.  The ooze was simply frosting dyed green.

Because I didn't know how else I would write his name in "teenage mutant ninja turtle" font as my sister suggested, I did a frozen butter cream transfer using a computer print out I did of his name in said font.


Additional cake details - The cake was strawberry cake (a mash up/adaptation of my two favorite white cakes, here and here) with vanilla butter cream frosting, covered and decorated in store bought and homemade fondant.

Thursday, September 29, 2011

Pumpkin Streusel Muffins

My blog is in dire need of "fall-esque" goodies!  So, as promised, here's the first in the series of everything "fall" on my to bake list.  The original recipe had a cream cheese filling; however, I didn't have cream cheese or the time to add it.   I'm sure it would've bought these muffins to another level of goodness but you won't even miss it as they were delicious as is.  Also, I made my topping without pecans because my coworker has a nut allergy, but I highly recommend adding them.

Pumpkin Streusel Muffins
Adapted from Annie's Eats and BH&G New Cookbook
Makes 24 muffins


For the muffins:
3 cups all-purpose flour
1 tsp ground cinnamon
1 tsp ground nutmeg
1 tsp ground cloves
4 tsps pumpkin pie spice
1 tsp salt
1 tsp baking soda
4 large eggs
2 cups sugar
1 15 oz can pumpkin puree
1¼ cups vegetable oil

For the streusel:
1/4 cup brown sugar
1/4 cup flour
1/8 tsp ground cinnamon
1/8 tsp nutmeg
2 tbsp cold unsalted butter
1/4 cup pecans (optional)

Directions:
To make the muffins, preheat the oven to 350˚ F.  Line 2 muffin pans with 12 paper liners.  In a medium bowl, combine the flour, cinnamon, nutmeg, cloves, pumpkin pie spice, salt and baking soda; whisk to blend.  In the bowl of an electric mixer combine the eggs, sugar, pumpkin puree and oil.  Mix on medium-low speed until blended.  With the mixer on low speed, add in the dry ingredients, mixing just until incorporated.
To make the topping, combine the sugar, flour, cinnamon, and nutmeg in a small bowl; whisk to blend.  Add in the butter pieces and cut into the dry ingredients with a pastry blender or two forks until the mixture is coarse and crumbly.  Stir in the pecans, if using.
To assemble the muffins, evenly divide the batter between the 24 paper liners.  Sprinkle a small amount (tablespoon) of the topping mixture over each of the muffins.
Bake for 20-25 minutes.  Transfer to a wire rack and let cool completely before serving.
Store at room temperature in an airtight container for up to 2-3 days.

Friday, September 23, 2011

Fall Recipes

Happy First Day of Autumn! It's hard to imagine that it's already fall given the temperature around here is still in the 80s. Nonetheless, I dug up a few fall goodies from the archives for some inspiration.  I definitely will be revisiting the following as well as adding a few new ones like apple pie, pumpkin muffins, cinnamon rolls, and pumpkin snickerdoodles this season.

Snacks:

Wednesday, September 21, 2011

Winter Wonderland Cake

As I mentioned in my previous post, Cake4Kids held their inaugural Cake-Off4Kids Event last Saturday. There were about 50 cakes and 250 volunteers, family, friends, and supporters of Cake4Kids present to help Cake4Kids raise funds for their push to file for non profit status.   Even after putting in a lot of behind the scenes work for this event, I knew I wanted to bake a cake for the competition too.


This 6-8-10 tier white cake (from Baking Illustrated) with buttercream frosting covered in marshmallow fondant is my largest/heaviest/tallest cake to date.

The theme was inspired by my love of penguins.  I had a lot of help from my sister who made most of the fondant animals while I baked a lot of cake.

I have been using A Better White Scratch Cake recipe from Cake Central for over a year now but the recipe from Baking Illustrated is my new official go to white cake.  It was so light and fluffy and moist.  It probably isn't ideal for stacking and carving but given the right support, you can apparently stack anything.  And, in this case, I was able to carve out a portion of it for a slide.  I should've done the cut all the way around but I wasn't sure how it would hold up. Also, I baked the top tier in the Wilton Sports Ball pan instead of carving it for the same reason.

My 8-inch cake pans are actually 8.5 inches in diameter.  Hence, when placed on top of the 10-inch tier, there was absolutely no space to place the penguins.  Not pictured are three of the penguins which I simply had standing around on the back of the cake instead of my planned snowball fight.

My favorite one, if I had to pick, is the penguin making snow angels!  Again, due to lack of space, he had to be on top of the igloo but I think it sort of works.


Transporting the cake to the location 20 minutes away was nerve wrecking.  I have to thank my boyfriend for staying calm and getting us there in one piece.


Taking part in this event, from start to finish, was a lot of fun; the sweetest part was winning the best decorated category!

Tuesday, September 20, 2011

Black Bottom Cupcakes

I have been baking diligently over the last month; however, finding the time to blog about it has evaded me as I juggled a SOX audit at work, Cake4Kids' inaugural Cake-Off4Kids event, and my second half marathon!  So, here's my attempt at catching up.

I made brookies again because I couldn't decide for a friend's backyard BBQ, which also happened to be a mini celebration for Cake4Kids as it was our one year anniversary!  I made a double batch of  brownies in a 9x13 pan but there wasn't enough cookie dough to go around this time.  Next time, I would just stick to a full batch of cookie dough and a double batch of brownies to create two distinct layers of goodness.


I made some snickerdoodles out of my Baking Illustrated cookbook and it has blown away my previous go to recipe.  We ate them up so fast that I didn't get a chance to take any pictures!

I also made black bottom cupcakes for a work function and despite how unattractive they looked (as the cheesecake overflowed), everyone raved about them.  Then again,what's not to love about a cheesecake and cupcake combination.


Black-Bottom Cupcakes
slightly adapted from Smitten Kitchen

Makes approximately 12 cupcakes


For the filling:
8 ounces cream cheese, at room temperature
1/3 cup granulated sugar
1 large egg, at room temperature

1/2 tsp vanilla extract
1/4 cup of mini chocolate chips


For the cupcakes:
1 1/2 cups all-purpose flour
1 cup firmly packed light brown sugar
5 tablespoons natural unsweetened cocoa powder (not Dutch-process)
1 teaspoon baking soda
1/4 teaspoon salt
1 cup water
1/3 cup unflavored vegetable oil
1 tablespoon vinegar
1 teaspoon vanilla extract


Make the filling:
Beat together the cream cheese, granulated sugar, extract, and egg until smooth. (Avoid over beating the mixture as it will get really runny and not sink to the bottom of the cupcake.) Stir in the mini chocolate chips. Set aside.

Make the cupcakes:
1. Adjust the rack to the center of the oven and preheat to 350°F (175°C). Line a 12-cup muffin tin with with paper baking cups.
2. In a medium bowl whisk together the flour, brown sugar, cocoa powder, baking soda, and salt. In a separate bowl or a 2-cup measuring cup, mix together the water, oil, vinegar, and vanilla.
3. Make a well in the center of the dry ingredients and stir in the wet ingredients; stirring until just smooth. DO NOT OVER MIX.
4. Divide the batter among the muffin cups. Spoon a few tablespoons of the filling into the center of each cupcake, dividing the filling evenly.
5. Bake for 25 minutes, or until the cheesecake filling looks set and the cupcakes feel springy when gently pressed.

6. Serve cupcakes hot, room temperature, or cold.  Leftovers should be stored in the fridge for up to 3 days.

Wednesday, August 10, 2011

Strawberry Cheesecake Cake


I have been meaning to do another "cheesecake" cake since the very first time it was featured here on my blog.  I finally got a chance to make another version for my dad's birthday cake.  This time around, it was a strawberry cheesecake shortcake.  Cheesecake and stabilized whipped cream frosting was from my favorite cheesecake book, Junior's Cheesecake Cookbook while the white cake was from one of my go to recipes.

 Layer one - Half of a white cake layer + whipped cream frosting + fresh chopped strawberries

 Layer two - Strawberry cheesecake

 Layer three - More whipped cream frosting + chopped strawberries

 Layer 3.5 - Other half of the white cake layer

Lastly, cover in a stabilized whipped cream frosting and decorate as desired.

Sunday, July 24, 2011

Desserts for a Bridal Shower

The week following my first wedding "cake", my sister, again, talked me into doing something I have never attempted to do.  I helped her put together SEVERAL different desserts for her friend's bridal shower.  The theme was Fall In Love sprinkled with Disney; given the wedding would be in September and the honeymoon in Disneyworld.  Over a span of two days, my sister and I worked together to make the following desserts:

Leaf Shaped Fondant Toppers

Caramel Apples

Candied Apples

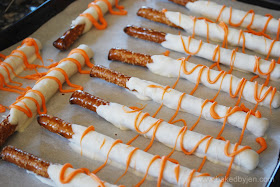
Candy Dipped Pretzel Rods

 Minnie-esque Sugar Cookie Favors (Pictured w/o the Personalized Names)

On top of all of this, my sister with the help of a friend also made all of the decorations; from the banner to the tissue pom-poms to the food label cards with Disney Characters on them.  She even went as far as making leaf shaped tortilla chips!  It was a lot of work but definitely a lot of fun helping put together a full on themed party.