Friday, April 22, 2011
Angry Birds Sugar Cookies
It's my friend's 30th birthday today and I'm flying out to San Diego as we speak to help her celebrate this weekend! I didn't want to risk making a cake or cupcakes and having it confiscated at the security check point; so, I decided on something I can easily pack into my carry on bag, sugar cookies. She is as addicted to the Angry Birds game as I am so I knew this would be a cute and fun gift.
After sketching out the images and writing up the schematics, I got a bit nervous with how much work it would be for me. My sugar cookie decorating skills are very limited. But then, I realized that I could just use fondant! Having never tasted fondant on a sugar cookie, I definitely made sure that these cookies were nice and thick. I even found the greatest way to measure the thickness of the cookies; I rolled the dough out in between two chopsticks I had laying around which measured 1/4 inch thick exactly!
Wednesday, April 20, 2011
Chic Birthday Cake
By adding a bow to the cake, I turned it from simple to chic! This cake was made from the extra chocolate cake layers and peanut butter frosting I had saved in the freezer from the Hello Kitty Baby Shower cake I made the other week. I sampled some of the trimmings when I was reshaping the cake and I swear it seemed more moist than the first time around.
When I freeze my cake layers, I triple wrap it in saran wrap and then place in it a Ziploc bag. The cakes can be frozen for up to two months without losing its flavor. When I need to use it, depending on whether I'm carving or not, I'll thaw it slightly or completely before use.
Sunday, April 17, 2011
Caramel-Filled Brownies
I used the opportunity to make the caramel filled brownies I saw on Buns In My Oven, which was Brady's Baking guest post, for the event. I figured the bars would be perfect being easy to individually package for selling.
Makes about 24 - 2x2 inches brownie squares
1 1/2 cups pecans
1 cup (2 sticks) unsalted butter
12 ounces bittersweet chocolate, coarsely chopped
1 1/2 cups sugar
4 large eggs
1 tablespoon vanilla extract
1 1/4 cups all purpose flour
1/2 teaspoon salt
1 (14 oz) bag of caramels, unwrapped
1/3 cup heavy cream
1 cup semi-sweet chocolate chips
Preheat oven to 350 degrees F. Place pecans on a cookie sheet and toast for 7-9 minutes or until golden brown and aromatic. Let cool and coarsely chop.
Line a 13×9 inch pan with foil or parchment paper and grease with butter or cooking spray. Make sure to get the sides of the pan really well so the caramel won’t stick.
Place chocolate and butter in a medium saucepan and set over very low heat. Stir gently until chocolate is melted and smooth. Transfer the chocolate mixture into a large mixing bowl and let it cool for 5 minutes.
Add sugar, eggs and vanilla; mix for about 2 minutes with a whisk until batter is thick and glossy. Gently stir in flour and salt. Pour half of this batter (about 2 1/2 cups) into the lined pan and bake for 20 minutes. Cool for about 20 minutes while you prepare the caramel layer.
Add the caramels and cream to a medium saucepan, set on low heat and stir until caramels are melted and smooth. Stir half of the chopped pecans into the caramel. Pour the caramel mixture over the baked brownie layer and spread evenly.
Spread the remaining brownie batter over the caramel filling. Sprinkle the chocolate chips and remaining nuts on top of the brownie batter. Bake at 350 degrees for another 20 minutes or until the top batter appears set but not dry. Allow brownies to cool completely; this will take several hours (or overnight). Lift brownies from pan, removepaper , and cut brownies into squares for serving.
Filed under:
caramel filled brownies,
recipe
Monday, April 11, 2011
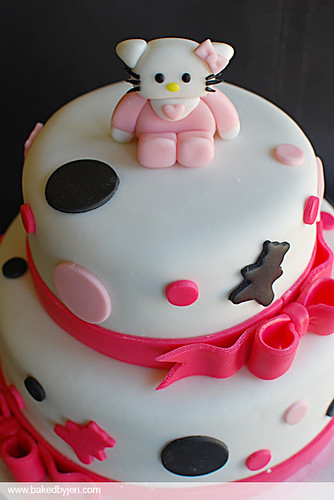
Hello Kitty Baby Shower Cake

For those following my progress, I've made a baby shower cake before and a Hello Kitty cake, not once but twice before. So, it couldn't be long before I made a combo of the two, a Hello Kitty baby shower cake!

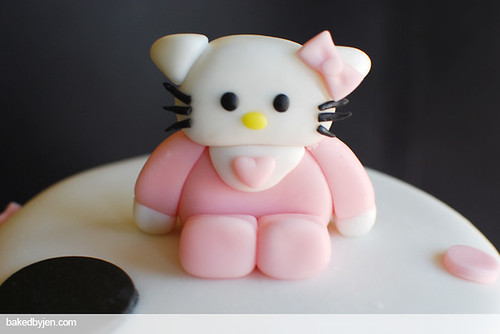
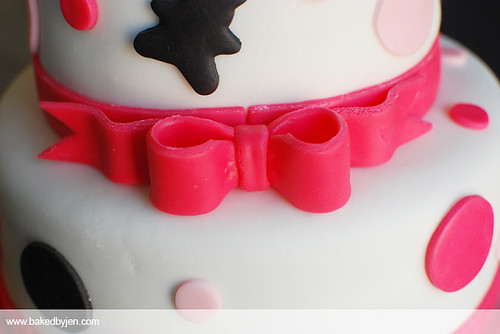
I had a lot of fun decorating this cake. I absolutely love Pink Cake Box's work. So, this was definitely inspired by their baby shower cakes; especially the ones with the cute bows! I did make it my own by handcrafting a baby Hello Kitty topper for my friend (the receipient) who loves Hello Kitty. I also added a bunch of teddy bear cutouts onto the cake.

The tiers were made from carrot and chocolate cakes with cream cheese frosting and peanut butter frosting. Everything was covered and decorated with homemade marshmallow fondant. I'm sharing the peanut butter frosting as it was ridiculously good for something I just threw together because I was too lazy to go to the store to buy more butter and powdered sugar.
Peanut Butter Frosting
A Baked By Jen Original
Makes about 3 cups
1 cup of peanut butter
1/2 cup of butter
4 oz cream cheese
2 teaspoons of vanilla extract
3 cups of powdered sugar, sifted
3 tablespoons of milk
Cream together the peanut butter, butter, and cream cheese until smooth.
Add the vanilla extract.
Slowly mix in the powdered sugar. Scrape the bowl down often.
Add the milk. Beat until light and fluffy.
Sunday, April 3, 2011
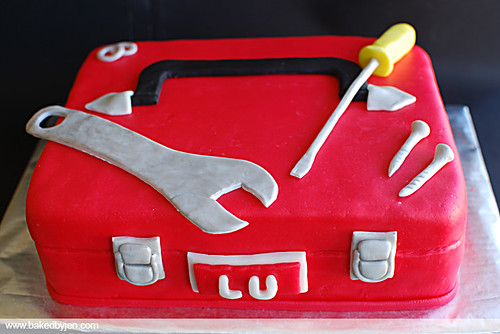
Tool Box Cake

Finally got back into the kitchen to make another fondant cake. I can't believe an entire month has passed since I made the Nikon Cake. My cousin requested this cake for her husband's birthday. She didn't have any ideas on what she wanted for him; so I suggested a tool box as he is a mechanic and she let me run with it.
I baked four 8x8-inch vanilla cake layers (adapted from Baking Illustrated) and ended up just using 2 and 1/2 cake layers. After I filled the cake with kahlua mousse filling, frosted the cake with vanilla buttercream frosting, and covered the cakes with marshmallow fondant, I realized that it looked a lot like a suitcase. I should've trimmed a bit off from the front! Speaking of the front, I personalized it by replacing where the brand name Craftsman would've been with the recipient's name.
I made the screwdriver with my amazing new tool, the clay extruder; no more uneven ropes! Also, for black and red fondant pieces, I have been staying away from dying my marshmallow fondant and have been using store bought fondant instead but I recently purchased some Americolor Soft Gels Paste and it did not disappoint with how vibrant it made my fondant. Good thing as I'm having better luck working with marshmallow fondant than store bought fondant lately. All the gray pieces was white fondant covered with silver luster dust.
Subscribe to:
Comments (Atom)


